Stirling and Bridge of Allan Tramways
Summary
Somewhat surprisingly for an early provincial horse tram system, the Stirling and Bridge of Allan Tramways Company appears to have issued uniforms to its drivers and conductors from the very outset. Drivers and conductors initially wore plain blue single-breasted jackets with five buttons, a slit breast pocket and lapels. Caps were in a kepi style with — somewhat unusually for a tramway system — a squat white hat band; whether or not this bore a badge is unclear, though photographs certainly show no evidence of one. Conductors were issued with smart double-breasted jackets with lapels, the upper collars of which were decorated with material of a much lighter colour; this may simply have been an embellishment of some kind, though it could equally have borne a cloth badge.
From mid 1897 onwards, Stirling Town Council required tramcar staff to wear metal licences on their left breasts, however, photographs would suggest that this wasn't rigorously enforced, at least not until the latter years of the tramway's existence.
It is unclear whether the company employed inspectors, though a single photo below hints that they may have done. If the individual depicted below is indeed an inspector, then it would appear that their uniforms did not differ at all from those worn by tramcar staff.
In common with many UK tramway systems, the company employed female staff during the Great War to replace men lost to the armed services. Despite the fact that many photographs from this period reveal the company's trams to have been in rather decrepit condition, suggesting that money was in rather short supply, no expense appears to have been spared in obtaining uniforms for the ladies. In fact, the company effectively copied that issued by Glasgow Corporation Tramways, namely: a bottle green single-breasted jacket with five buttons, four pockets and lapels (no waist belt however) and a long tartan skirt. Whether the tartan was the same as that used by Glasgow - the Black Watch - is unknown. Photographs show two different types of bonnets, which suggests that the company perhaps left the choice of headgear to the ladies themselves. No badges of any kind appear to have been worn on either the jackets or the hats.
My thanks go to Alan Brotchie for providing the excellent quality photographs and the background information.
For more information on this tramway, see 'The Tramways of Stirling' by Alan W Brotchie; N B Traction Group (1976).
Images
Horse/petrol tram drivers and conductors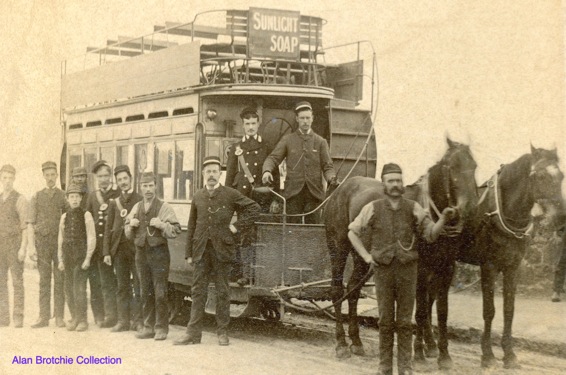
Several members of staff pose with what is possibly Horsecar No 7 — photo undated, but probably taken in the 1880s.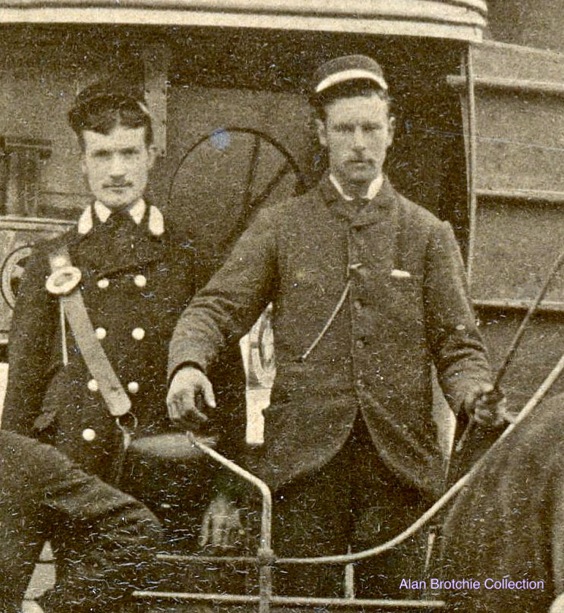
A blow-up of the above photo showing the conductor and driver. Whilst they both appear to have the same headgear, the conductor's smart double-breasted jacket marks him out.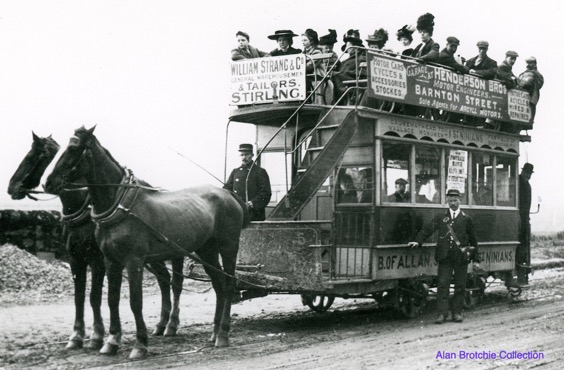
Stirling Horsecar No 5 on Causewayhead Road circa 1906.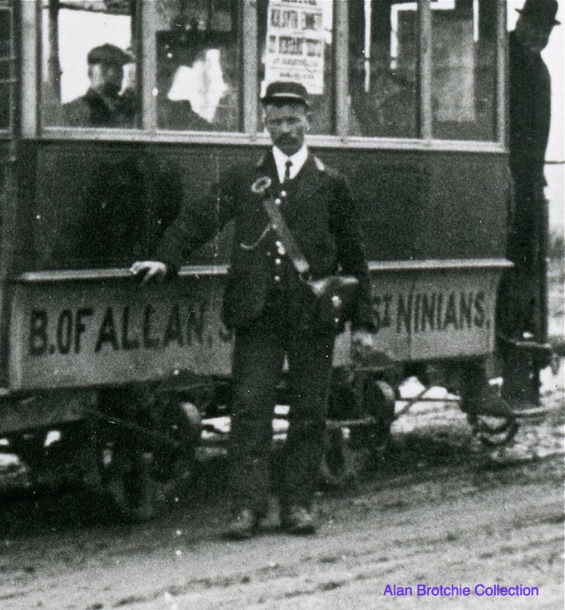
A blow-up of the above photo showing the conductor, James Marshall, whose licence is depicted below. Curiously, although horsecar staff had been required to wear licences since 1897, neither man in this shot appears to be doing so.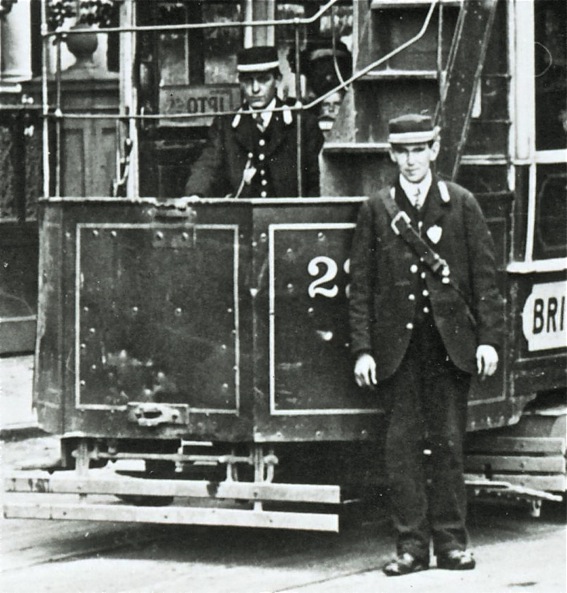
The crew of Petrol Tram No 22 pose for the cameraman on St Ninians Road circa 1917. Both men's licences are clearly in evidence.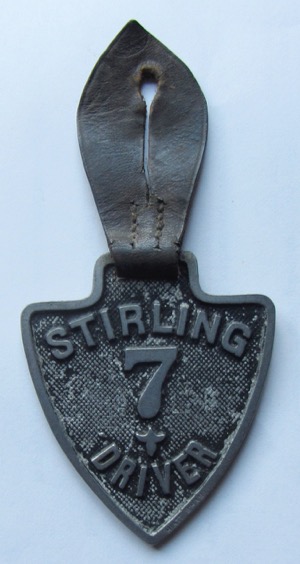

Stirling 'Driver' licence No 7 — issued to James Marshall — and 'Conductor' licence No 43. Alan Brotchie Collection.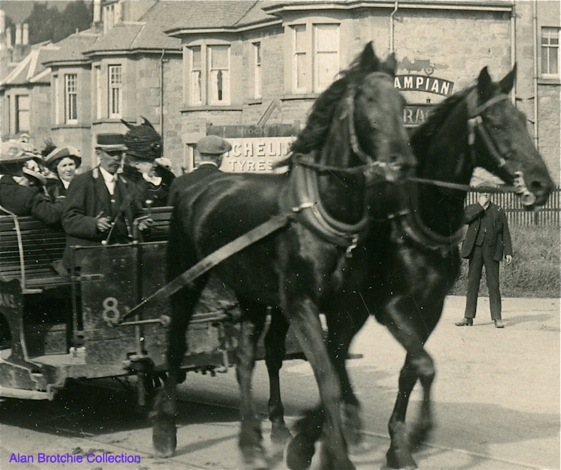
The driver of open-topped, single deck Horsecar No 8 spurs his charges on at the Sheriffmuirlands Loop — photo undated, but from the men's large flat caps, probably not long before closure.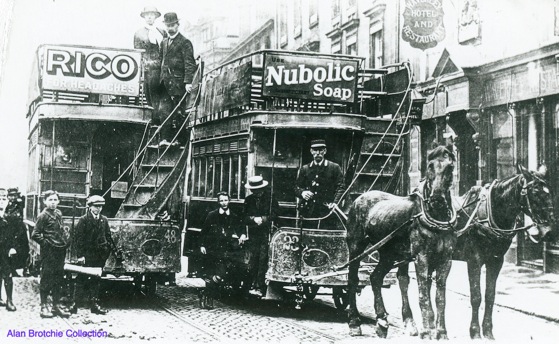
A post-Great War scene taken at the Port Street terminus showing two incredibly battered horsecars, and rather emaciated looking horses (at least to our modern eyes). The conductress at the extreme left is 'Wee Jean' Angus (see below for a close-up photo).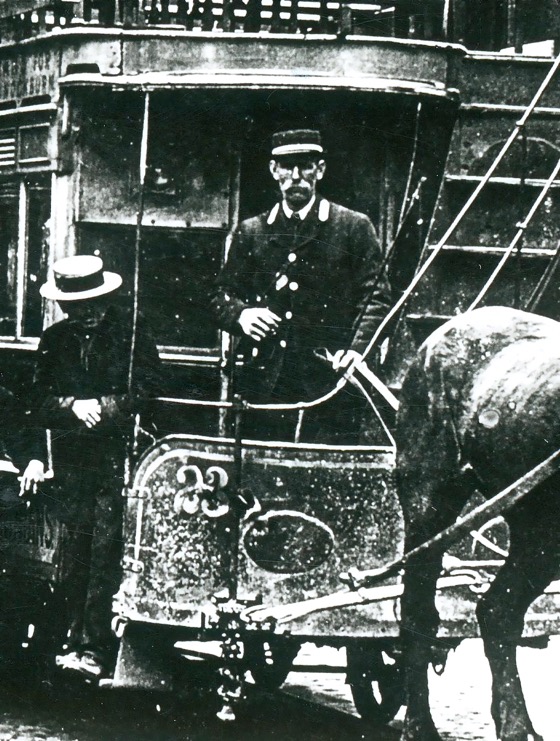
A blow-up of the above photo showing the driver. His licence appears to be hung from the top button of his jacket.
Senior staff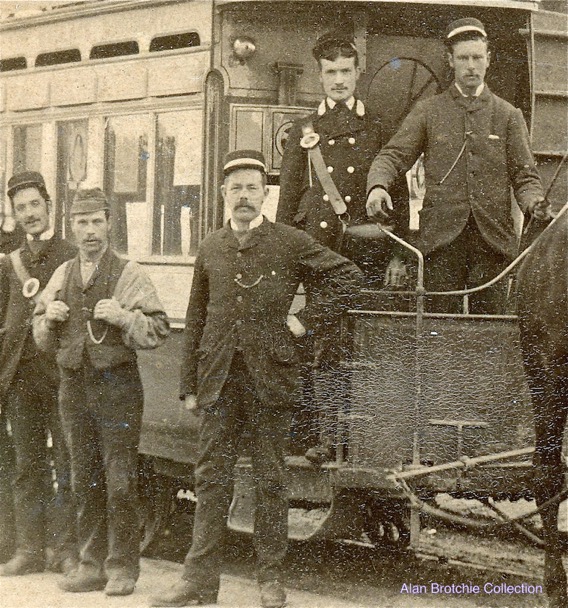
A blow-up of the 1880s photo above showing a rather proprietorial looking individual, who may possibly be an inspector, though this is far from certain.
Female staff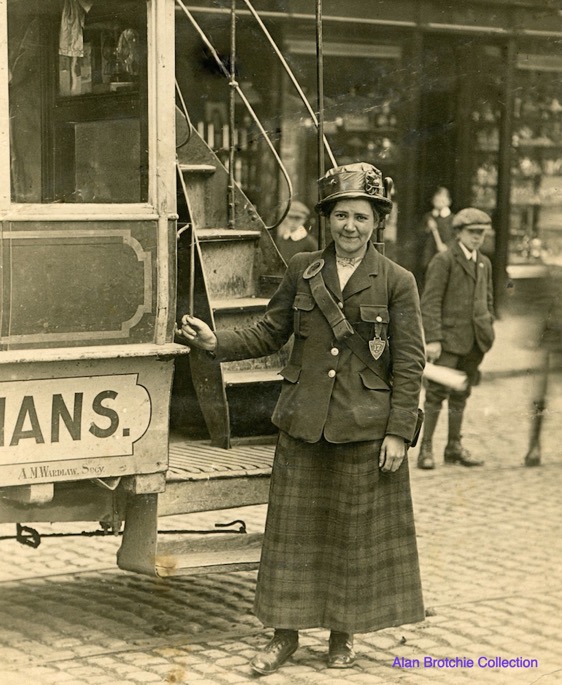
A wonderfully evocative portrait of Jean Angus, known to all as 'Wee Jean', in what was a particularly stylish uniform for such a small system — photo taken circa 1917. 'Wee Jean' started her tramway career on the 20th March 1916, later marrying Petrol Tram driver Peter Petrie.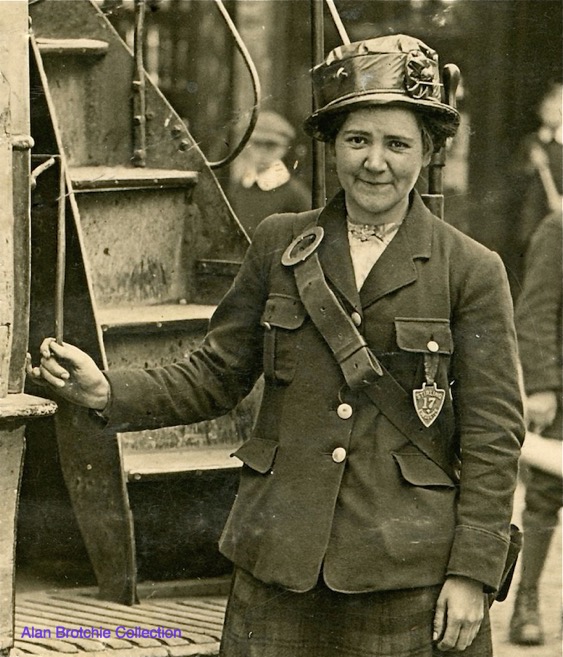
A blow-up of the above photo showing details of the uniform and licence (No 17). The uniform was very similar, if not identical to that issued by Glasgow Corporation Tramways, green jacket and tartan skirt.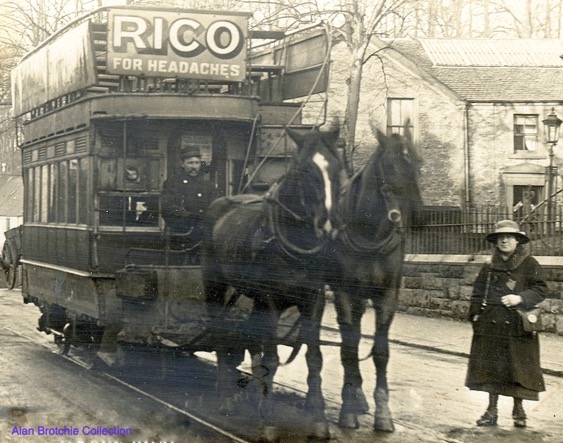
A shot of Horsecar No 48 taken at the Bridge of Allan terminus, either during or shortly after the Great War. The conductress was known as 'Big Jean', and is thought to be Jean McDonald.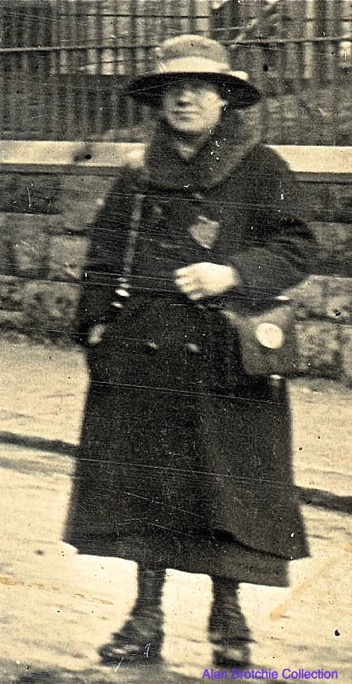
A blow-up of the above photo, which although blurred, suggests that the cash bags may have been numbered, though this may equally have been personal adornment.